Learn how to safely replace your car's brake pads at home. This detailed guide covers everything from checking pad wear to bedding in new pads, saving you up to £150 on garage labour.
Brake pads are one of the most critical safety components on your vehicle. They create the friction needed to slow and stop your car when you press the brake pedal. Over time, the friction material wears down and needs replacing — typically every 25,000 to 65,000 miles depending on your driving style and conditions.
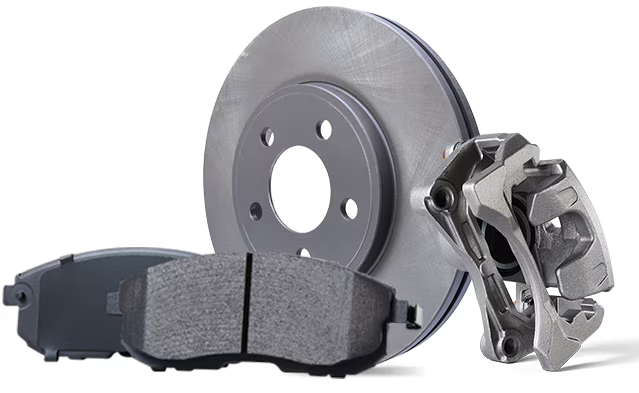
Replacing brake pads is one of the most common DIY car maintenance tasks, and doing it yourself can save you £80–£150 in labour costs. While it requires some confidence working with your car, it's well within reach for a home mechanic with basic tools.
In this guide, we'll walk you through the entire process from start to finish — including how to know when your pads need changing, what tools you'll need, and how to properly bed in new pads for maximum stopping performance.
Always work on a flat, level surface with the handbrake engaged. Use axle stands — never work under a vehicle supported only by a jack. Wear appropriate PPE including gloves and eye protection. If you're unsure about any step, consult a qualified mechanic.
Park on a flat, level surface and engage the handbrake. If you're replacing the rear pads, leave the car in gear instead. Loosen the wheel bolts by a quarter turn while the car is still on the ground — this prevents the wheel spinning when raised. Place chocks behind the wheels that will remain on the ground.
Never work under a vehicle supported only by a jack. Always use axle stands rated for your vehicle's weight.
Raise the car using the jack at the manufacturer's recommended jacking point (check your owner's manual). Place an axle stand under a solid chassis point and lower the car onto it. Remove the wheel bolts fully and take the wheel off. You'll now have a clear view of the brake caliper, pads, and disc.
Place the wheel flat under the car's sill as an extra safety measure. If the axle stand fails, the wheel will prevent the car from falling to the ground.
Locate the two caliper slide bolts (also called guide pins) on the back of the caliper — typically 13mm or 7mm Allen key. Remove the lower bolt first, then the upper bolt. Carefully lift the caliper away from the disc. Do NOT let it hang by the brake hose — use a wire hook or cable tie to suspend it from the spring or strut.
Letting the caliper hang by the brake hose can damage the hose internally, causing a dangerous brake fluid leak that may not be immediately visible.
With the caliper removed, the old brake pads should slide out of the caliper bracket (also called the carrier). Note their orientation — many pads have a wear indicator tab that sits on the inner side. Some pads are held in by spring clips; gently prise these away. Inspect the old pads: if they're below 3mm of friction material, or if wear is uneven, you've confirmed they need replacing.
Take a photo of the pad arrangement before removing them. This helps you remember the correct orientation when fitting new ones.
While the pads are out, inspect the brake disc. Run your finger across the surface — you should feel a smooth, even face. Look for deep grooves, scoring, cracks, or a visible lip at the outer edge. Measure the disc thickness with a vernier calliper if possible; compare to the minimum thickness stamped on the disc or hub. If the disc is below spec or badly scored, replace it at the same time.
Fitting new pads on a worn disc will cause uneven braking, noise, and dramatically reduced pad life. Don't skip this check.
The new pads are thicker than your worn ones, so you need to push the caliper piston back into its bore to create clearance. For front brakes, use a C-clamp or piston rewind tool to press the piston straight back in. For rear brakes with an integrated handbrake, you'll need to rotate the piston clockwise while pressing — a rewind tool with adaptor plates makes this much easier. Before pushing, open the brake fluid reservoir cap to prevent pressure build-up.
Check your brake fluid reservoir as you retract the piston — fluid will rise as the piston moves back. If it overflows, mop it up immediately as brake fluid damages paintwork.
Clean the caliper bracket with a wire brush and brake cleaner to remove any rust or debris from the pad slides. Apply a thin layer of copper grease to the pad backing plates (never on the friction surface) and to the slide points on the bracket. Slot the new pads into the bracket, ensuring the wear indicator is positioned correctly (usually on the inner pad, facing the piston side).
Some premium pad sets include new anti-rattle clips and fitting hardware. Always use these if supplied — they prevent vibration and squealing.
Lower the caliper back over the new pads and disc. Thread the slide bolts in by hand first to avoid cross-threading, then torque them to the manufacturer's specification (typically 25–35 Nm for guide pins — check your manual). Refit the wheel and hand-tighten the bolts. Lower the car off the axle stand and torque the wheel bolts to spec in a star pattern (typically 110–120 Nm for most cars).
Before starting the engine, pump the brake pedal several times until it feels firm. The first press after a pad change will have no resistance because the piston is fully retracted.
New brake pads need a bedding-in period to reach full performance. Drive gently for the first 100 miles, making moderate stops from 30–40 mph. Avoid hard braking or riding the brakes. During this period, you may notice slight noise or reduced stopping power — this is normal as the pad and disc surfaces mate together. After bedding in, your brakes should feel smooth, quiet, and responsive.
After the first 100 miles, do 5–6 moderate stops from 40 mph to 10 mph with 30-second gaps between each. This builds an even transfer layer on the disc for optimal braking performance.
Find the best deals on the parts used in this guide. Compare prices across brands and save up to 40% on your repair.
